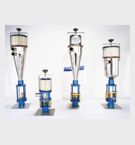
This describes the process steps the AUTOLOAD JR performs to
load resin your machine. The numbers in parentheses correspond to the picture
shown. Please note that the picture shows a 1525 but the operation of the
JR is similar.
- After completion of the Assembly Instructions plug the air supply onto
the Male Coupler Plug (#1) on the Control Unit.
- Plug the Male Plug (#2) of the Control Unit into your 115v AC receptacle.
- Plug the Accelerator (#3) into a Material Source (#4). Turn the On/Off
Switch (#5) to the on position. The Sensor (#6) will sense if there is any
material in the Sight Glass Assembly (#7).
- If no material is present in the Sight Glass Assembly (#7) the Sensor
(#6) will send the signal to the Solenoid Valve (#8) to supply air pressure
to the Accelerator (#3).
- The air moving through the Accelerator (#3) will cause a vacuum to be
formed and the material from the Material Source (#4) will be drawn from
that source and into the Accelerator (#3), it will then flow through into
the Material
- Transfer Hose (#9) and then pushed up into the Hopper Filter Assembly
(#10) where by gravity it will fall into the Sensor Sight Glass Assembly
(#7).
- The positive pressure that moved the material will bleed off to atmosphere
through the top of the Hopper Filter Assembly (#11), keeping all material
fines and dust entrapped in that assembly and letting the material fill
in front of the Sensor (#6) completing the loading cycle.